Exercise 1.2 – Point
- Take two or three photographs in which a single point is placed in different parts
of the frame.
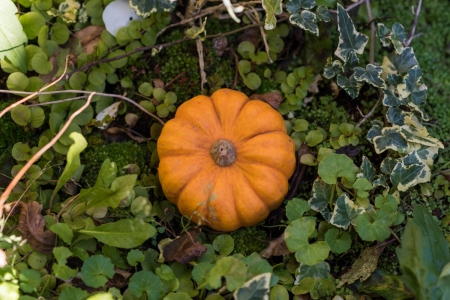
Image 1: – ISO 200, 85 mm, f/4, 1/320 sec
The point I chose to photograph was the small black hollow in the stalk of this ‘munchkin’ pumpkin.
I started by placing the point directly in the centre of the image. Something most people try to avoid, I think it works for this image.
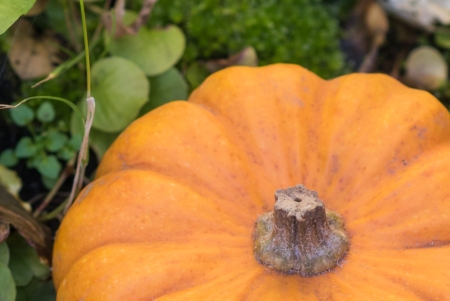
Image 2: – ISO 200, 85 mm, f/4, 1/160 sec
The second photograph is zoomed in much closer, but still uses the same ‘point’ but in the bottom right hand corner on the intersection of the thirds.
This is something I tend to use a lot in my compositions so it feels comfortable to me.
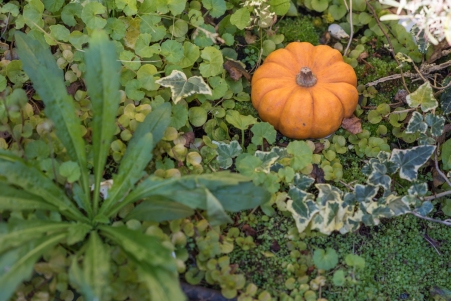
Image 3: – ISO 200, 85 mm, f/4, 1/400 sec
The final point is again on the right of the picture. Again I feel more comfortable placing my focal point on the right.
Is this because I read left to right?
The point seems clearer in the first two images. The point is formed by the whole end of the stalk which appears lighter.
I was interested to discover if this still works without the contrasting colours and therefore, I have converted the same images to black and white to see if that alters the feel of the composition.


This was a simple black and white conversion in Lightroom, but I did add a little contrast and brightened the oranges.
Logic to evaluation: How can you evaluate the pictures? How do you know whether you’ve got it right or not? Is there a right place and a wrong place for the point? For the sake of argument, let’s say that the right place shouldn’t be too obvious and that the point should be clear and easy to see. As there’s now a ‘logic’ to it, you can evaluate your composition according to the logic of the point.
Using the ‘logic’ given above I would evaluate the photos as follows:
Image 1: The ‘point’ is directly in the centre of the image, the colour surrounding it and the raidial lines on the pumpkin draw your eye towards it. The foliage around the pumpkin also appears to be circular, although on the black and white version the whites on the left of the photo are more distracting. I would evaluate this is a successful composition.
Image 2: The ‘point’ is on intersection of the bottom third and right third. It is surrounded by a block of colour which draws the eye to the darker colour in the centre of it. So again I would evaluate this as a successful composition.
Image 3: The ‘point’ is not in an specific place, but I would estimate it to be in a quarter way down the photograph on the right hand side. Although the point is very small in this photo, and there are other elements such as a large plant in the bottom left corner, your eyes still settle on the stalk in the middle of the pumpkin. It is also the most in focus element in the photograph. The single Ivy to the left of the pumpkin, is a bit distracting though. I would evaluate this photo as mostly successful.
It is very illuminating to see that the same point of interest can be captured in may different ways and each tells a different story even though you are looking at the same thing.
2. Take a number of images in which a point is placed in relationship to the frame
Staying with the pumpkin idea, I made a series of photos where the point was place in different places in relation to the frame. I also chose to change the angle and plane of some of the photos.
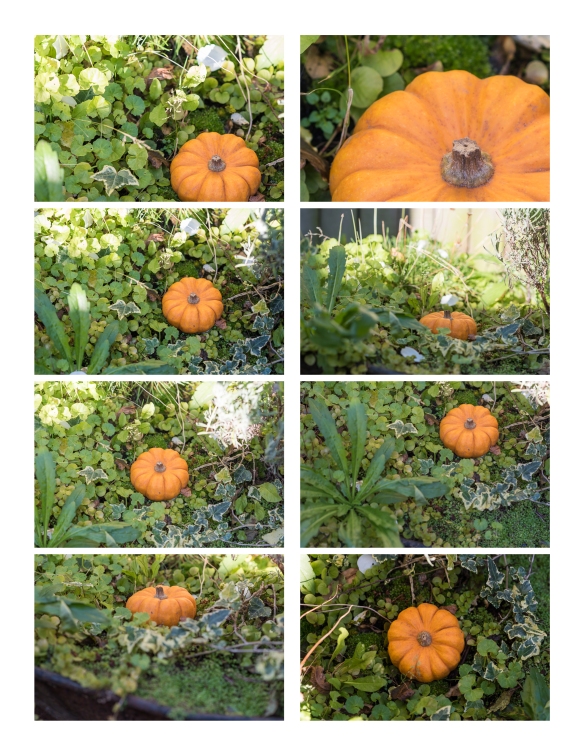
the ‘Point’ in relation to the frame
I reviewed all of the photos with a view to observing the way my eye ‘scans’ the surface of the image.
Noting how:
• a point attracts attention out of proportion to its size
• the eye looks for connections between two points
• placing a point close to the edge seems to animate both the point and the frame.

")
As a comparison to my results, I asked my husband to also undertake the exercise, having not seen the photos before. This was to see if my knowledge of the photos effected the way I scanned the photos.
In general both results are very similar, we found that:
- bright highlights draw the eye first
- the ‘point’ was the first or second point of view in the majority of cases.
- other elements in the image can either lead they eye to the point or become a distraction.
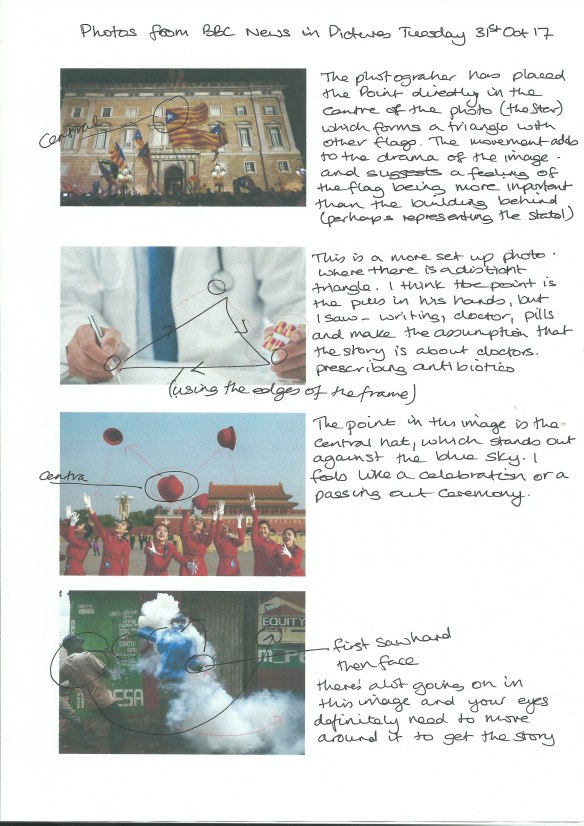
I also looked at some photos from the BBCs Week in Pictures page. http://www.bbc.co.uk/news/in-pictures-41776819 to see if they contained a point and whether it’s placement had an impact on the image: