
Exercise 2.1
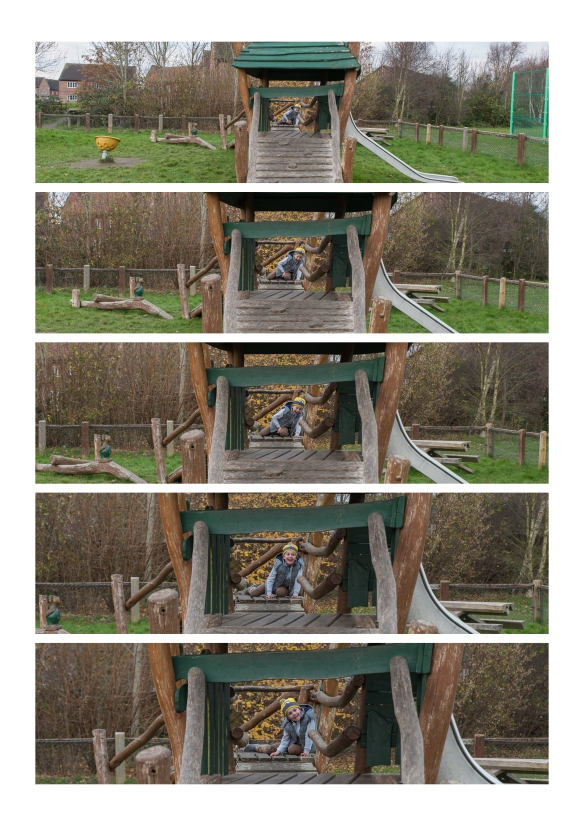
Find a scene that has depth. From a fixed position, take a sequence of five or six shots at different focal lengths without changing your viewpoint. (You might like to use the specific focal lengths indicated on the lens barrel.)
Technical Information:
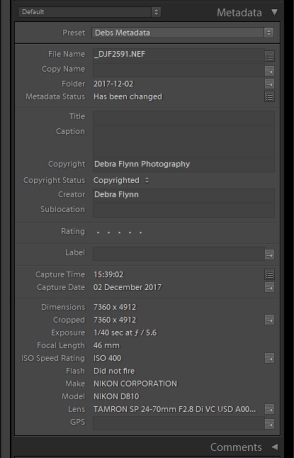
screenshot of metadata shown in Adobe Lightroom
It was only after completing this exercise, that I realised that I had set the camera manually rather than using aperture priority. So I have now changed the priority mode and will use if for the subsequent exercises in this Part.
Nikon D810 Camera (fx sensor)
The focal lengths used were:
- 24 mm
- 38 mm
- 46 mm
- 58 mm
- 70 mm
using a Tamron SP 24-70mm F2.8 Di VC USD A007N Lens
f/5.6
1/40 sec
ISO 400
Photos were taken in RAW, imported into Adobe Lightroom for minimal editing and saved as 1500 px Jpgs. None of the images have been cropped or straightened.
The lens I was using has a zoom range from fairly wide at 24 mm up to a mid range zoom of 70 mm. This is the lens I tend to use as my ‘go to’ everyday lens.
The first and widest photo, gives an overall view and helps place the climbing frame in its place. As the images scroll through, you do get a sense of moving towards the subject and the subject becomes more dominant to eye, so you look less at the surrounding elements in the image.
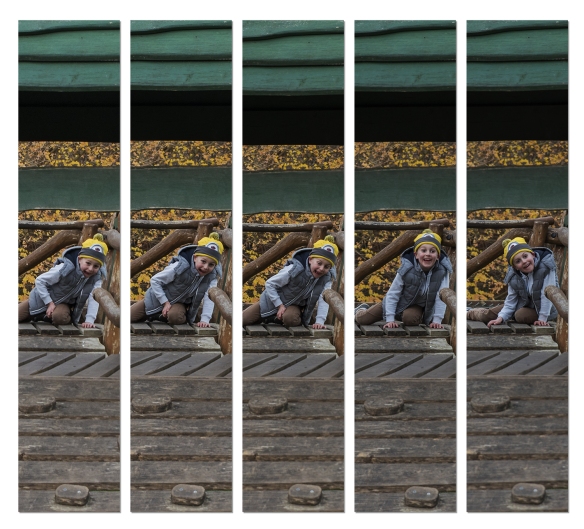
In this experiment, I have blown up a section of each of the photographs so that they are almost the same size. Obviously, the 24 mm needed to be blown up much more than the 70 mm photograph, but interestingly quality in the detail at this magnification, doesn’t seem to be that different.
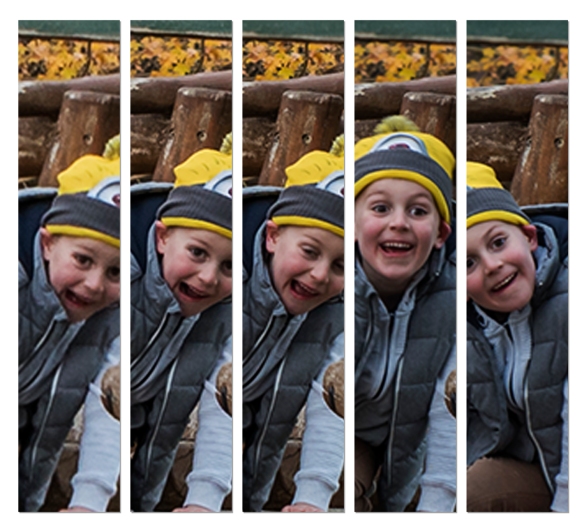
but when magnified even more, you can start to see the difference in the amount of detail that has been recorded between the 24 mm shot on the left and the 70 mm shot on the right:
Had my objective been to focus in on the boy, then getting closer and zooming would have been a better option to get a sharper image. However, in the context of him being a part of the wider photo, the quality is ok