Item 2 – Ralph’s object
Using the same methodology as for Item 1, I was blindfolded and given the item to hold for 5 mins, and recorded my comments. As previously, I have not yet seen the actual item. These will be viewed once all images are complete.
This item although small like the previous item it immediately felt very different. It felt like it was metal, there were two long protrusions and a couple of shorter ones, there was a groove down the middle and I could feel an ‘S’ shape. I really couldn’t make out which way up the object was supposed to go or what it was.
Notes made after touching / feeling the object

I thought about the kind of image I wanted to make from this item, but struggled to come up with any solid thoughts, I felt very confused and intrigued, but also that the object had some symmetry about it and it was definitely metal.
At first I was going to try and incorporate the hand again, but it just didn’t fit into the ideas I had. I also considered a slide, which I thought would give me the metal groove I was wanting. But eventually, I wanted to capture the confusion and lack of clarity that I had. The idea of a kaleidoscope came into my head so I looked up how to make a kaleidoscope in photoshop.
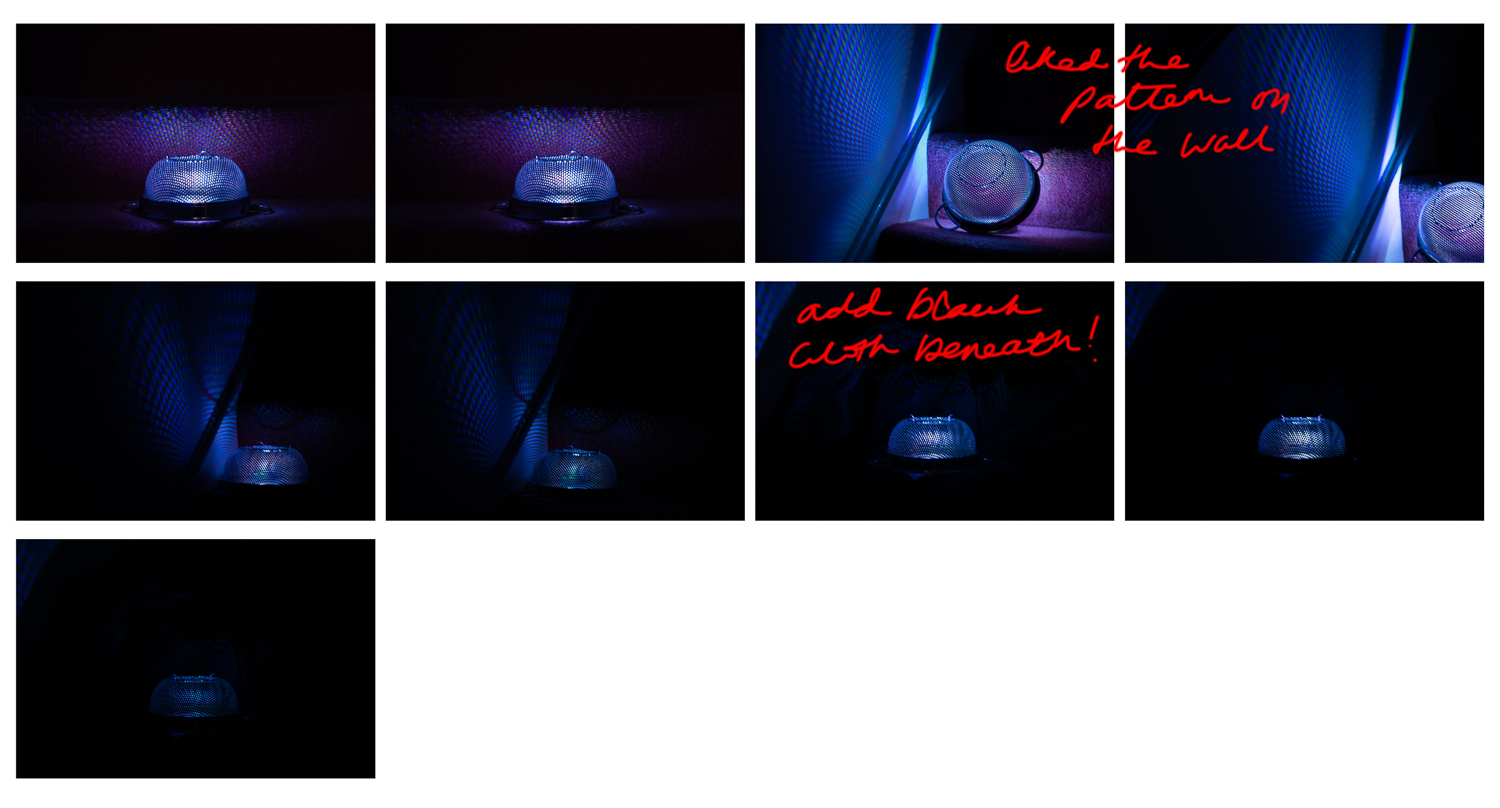
I found this tutorial on the internet: How to create a Kaleidoscope – then needed to take an image to use to create my image. I found a metal colander which had the inside curves I was looking for. I also liked the idea of shining a light through the colandar. I added a blue gel to the speedlight to give a blue light and took a range of images with the colander in different positions. These can be seen in the contact sheets below.
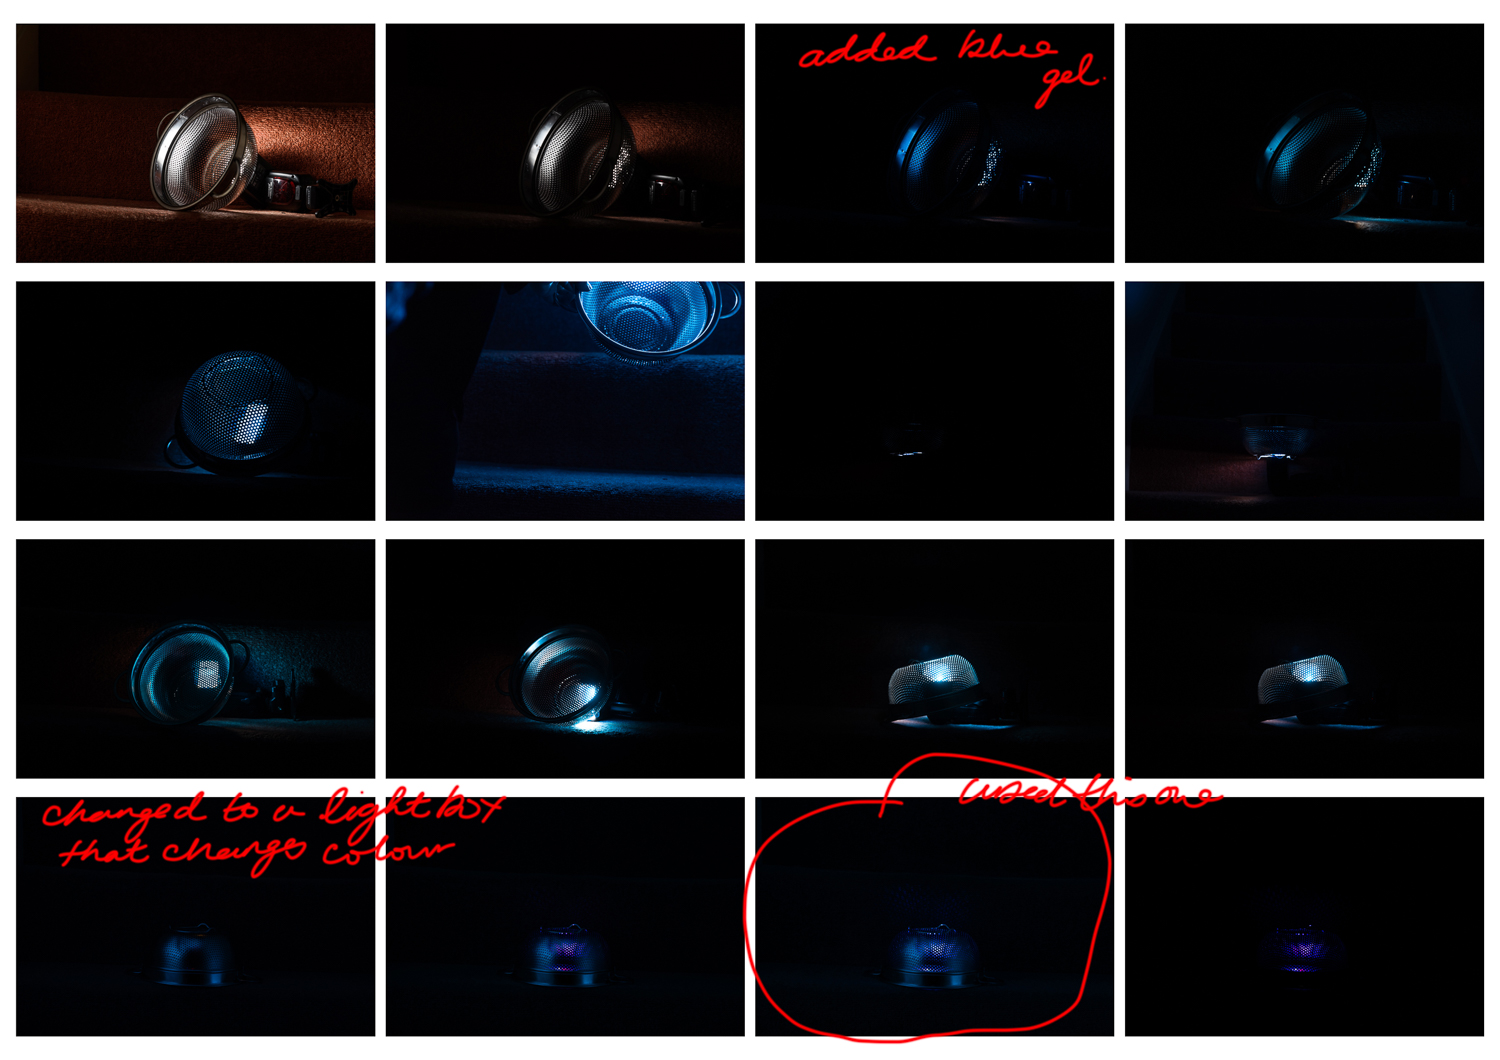
Although the image chose looks quite dark in the contact sheet there was nice light spatter on the carpet above it. I was also drawn to the two ‘feet’ on the top which reminded me of the two protrusions on the item I’d felt.
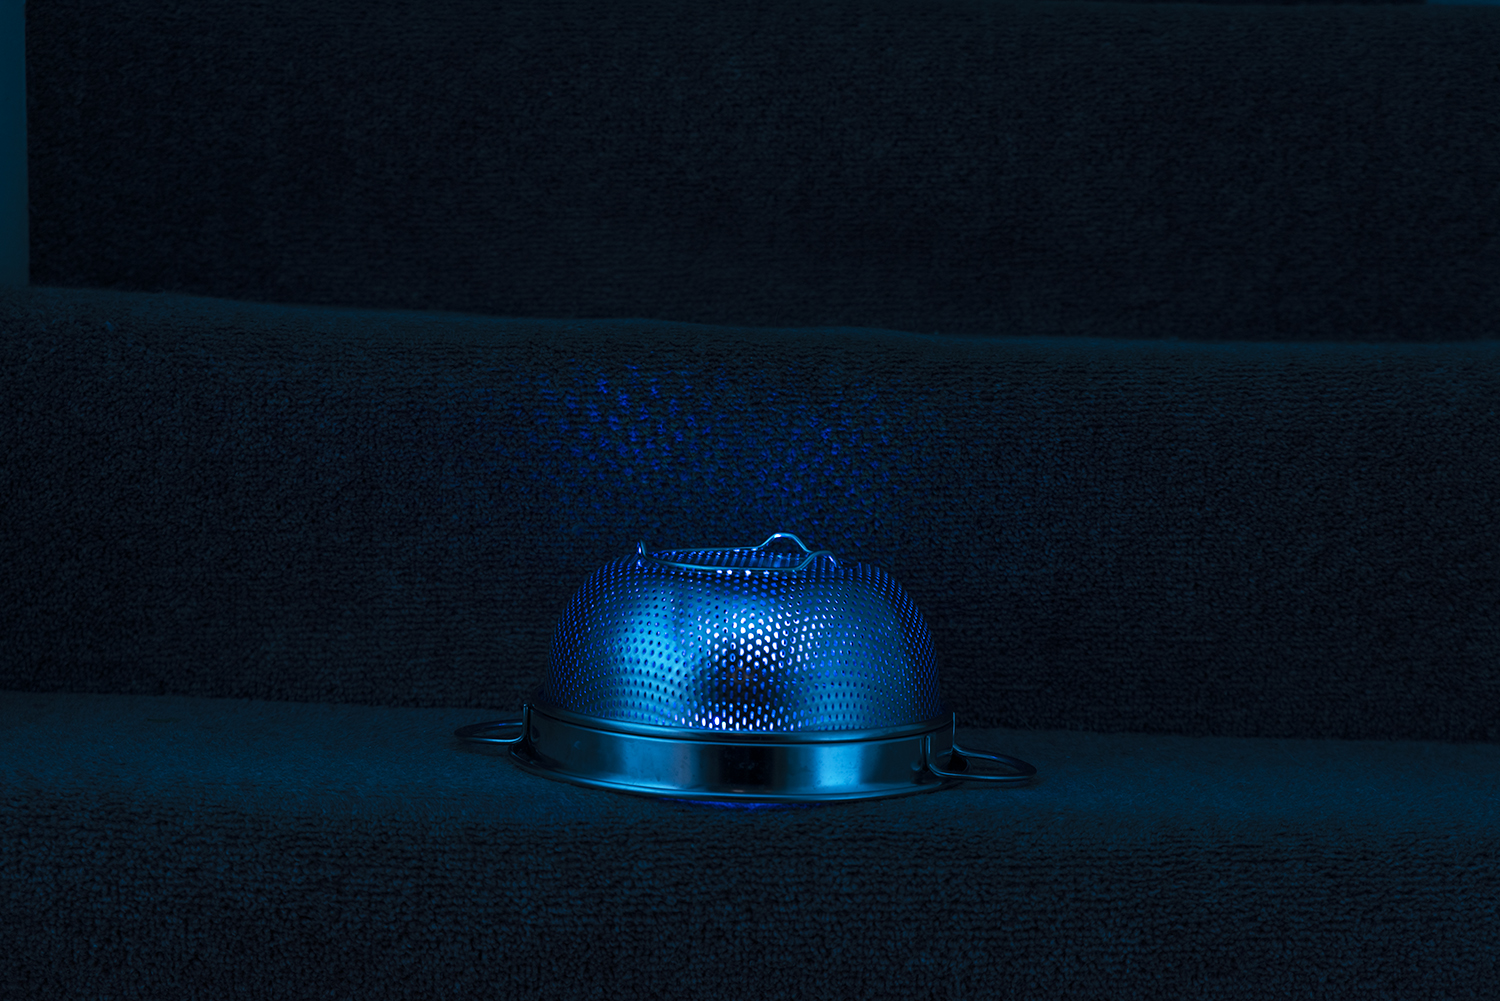
I used this image to create the kaleidoscope effect as per the tutorial.

I have annotated below the amendments made to the colander.
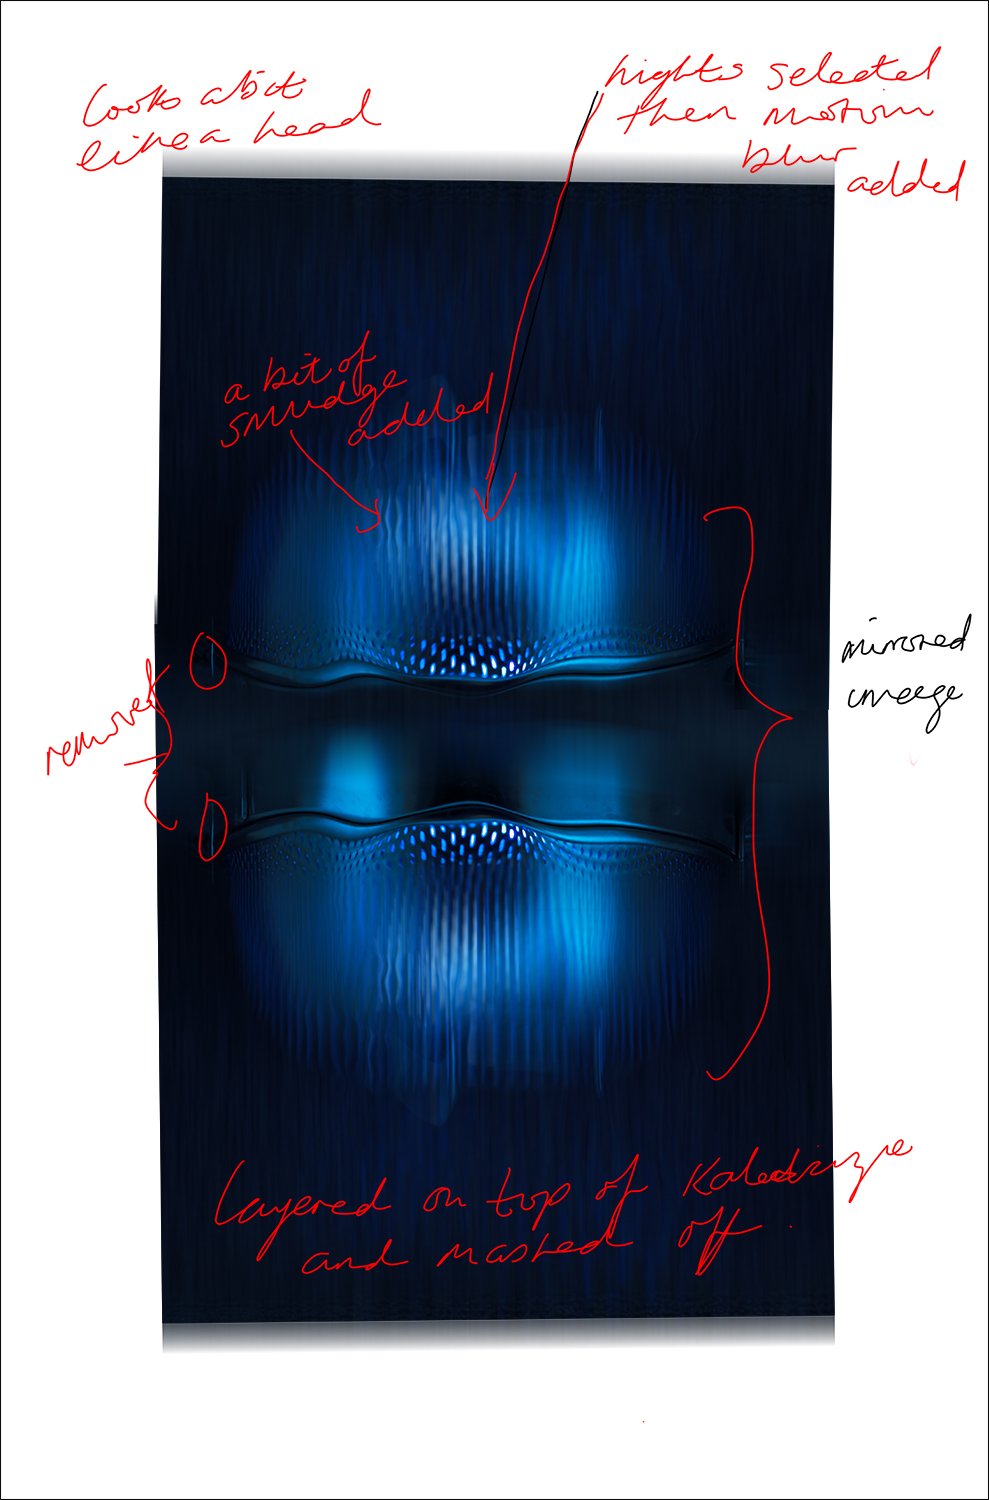
This layer was added on top of the kaleidoscope layer and masked to merge them together. The original image was also very blue, so I added a hue and saturation layer to desaturise the colour . I also added some radial blur to the background highlights to give it a softer look. The wavy lines in the centre represent the ‘S’ shape I felt. The image can be view either way up in order to represent the fact that I couldn’t figure out which way round it should be.
