Item 1 – Helen’s object
Context:
Helen is my sister, I gave her the brief and she provided me with the first object and test piece for this series of images.
sitting on the sofa in her lounge, I was blindfolded and then given the object. I remembered I should be recording about half way through my 5 mins, so my husband only started recording on my phone at the end.
To hear the recording click here
I cannot post the pic of me handling the item or the item itself because I haven’t finished the set yet, but I’ll add to the final assignment document.
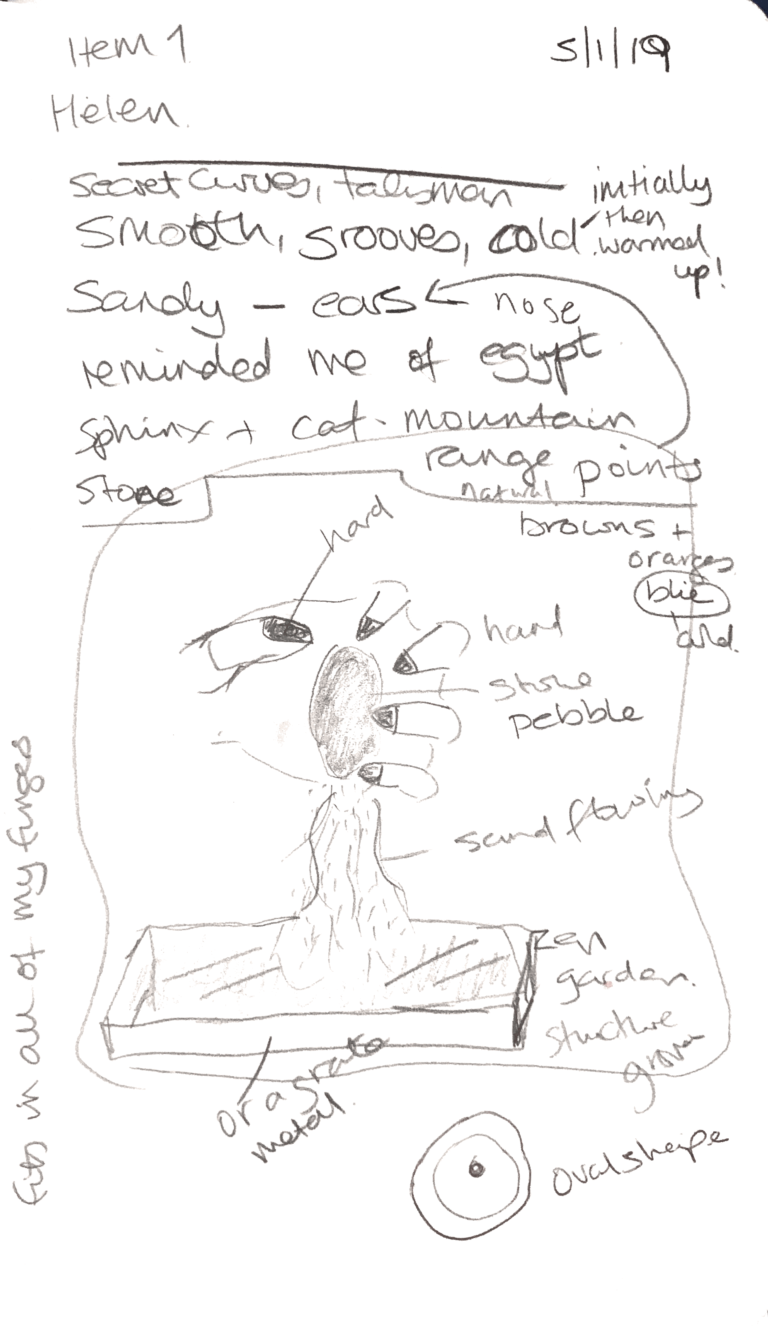
When I first held the object, I was a little underwhelmed, but I found it really interesting to be experiencing it without seeing it. I tried to create a visual image in my head based on what I was feeling. I got quite fixated on the groves in it and that fact that I thought my fingers were creating a little cage around it. I have very small hands, so I think it was a surprise that this object fit in my hand in this way.
I wasn’t sure I would be able to come up with an image at first, but on the drive home (my husband was driving), things began to start popping in my head and I drew the image above quite soon after. Once it was in my head, I couldn’t / didn’t want to change it. The colours came from the colours in a picture of an idol in a museum I took in Egypt a few years ago. When holding the item, it immediately popped into my head. This was a bit of research done in the middle of the night!!! looking through my old pictures for reference.
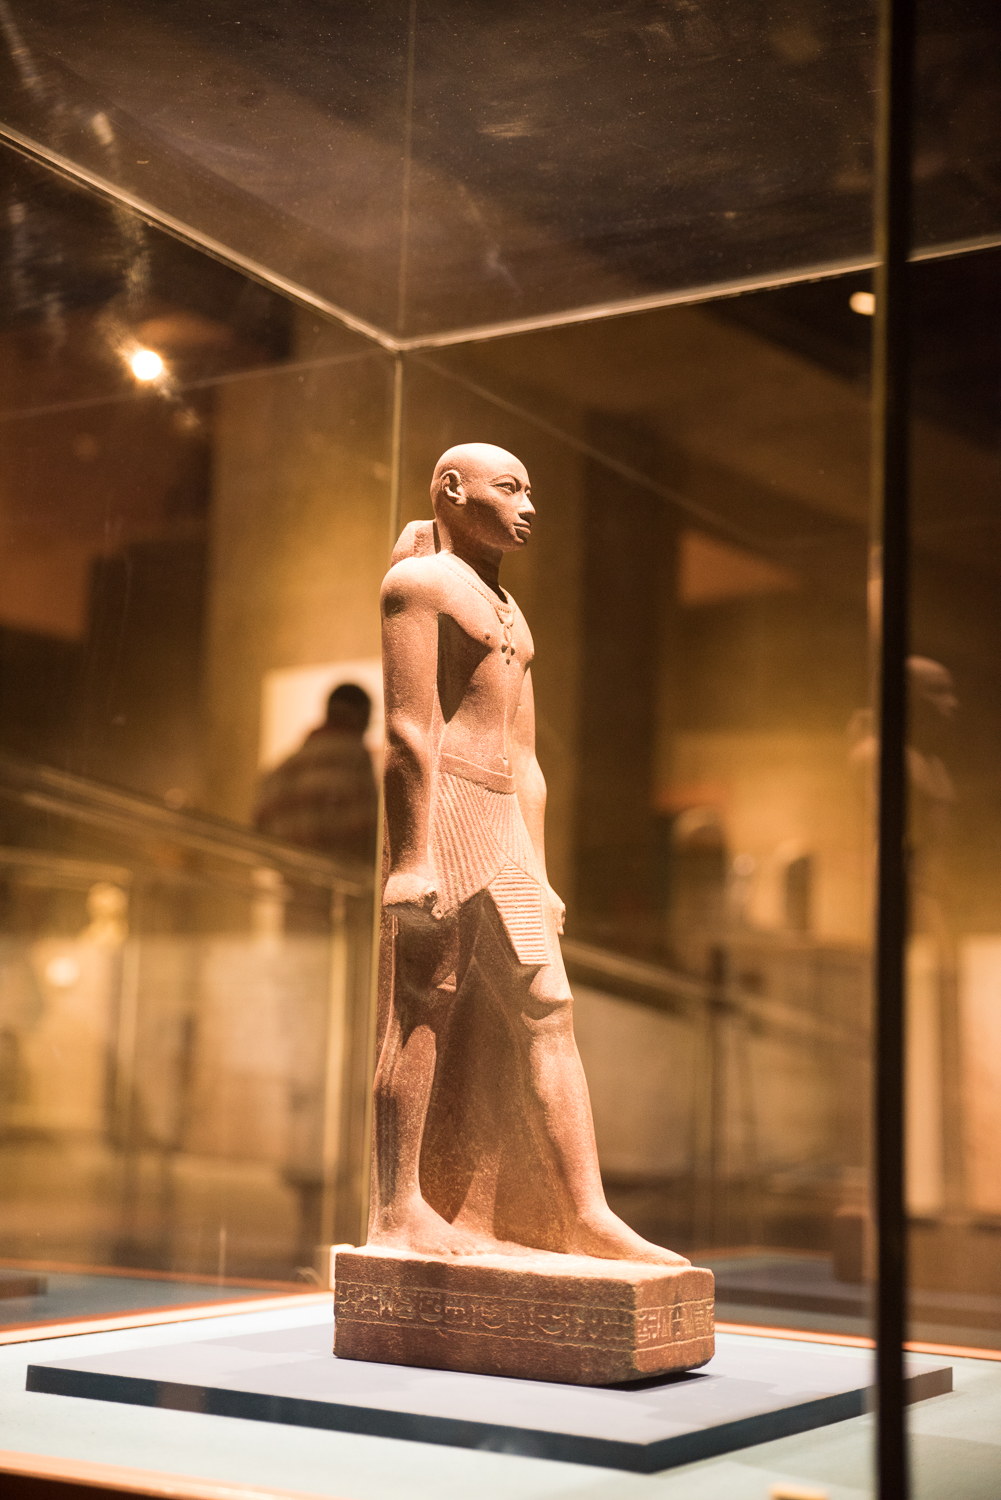
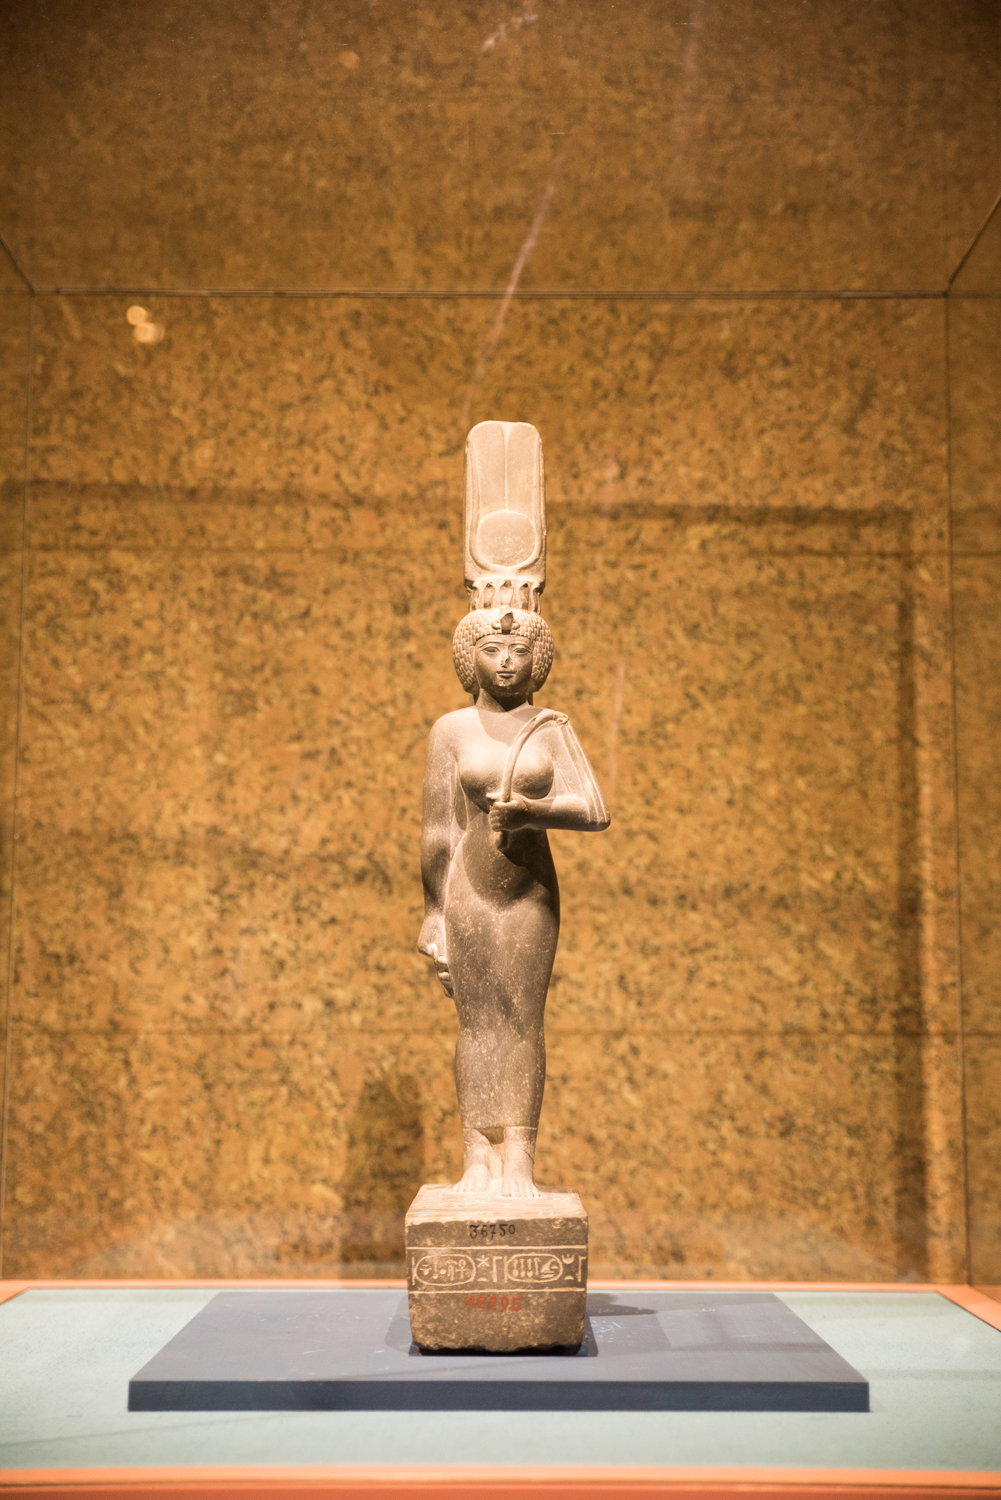
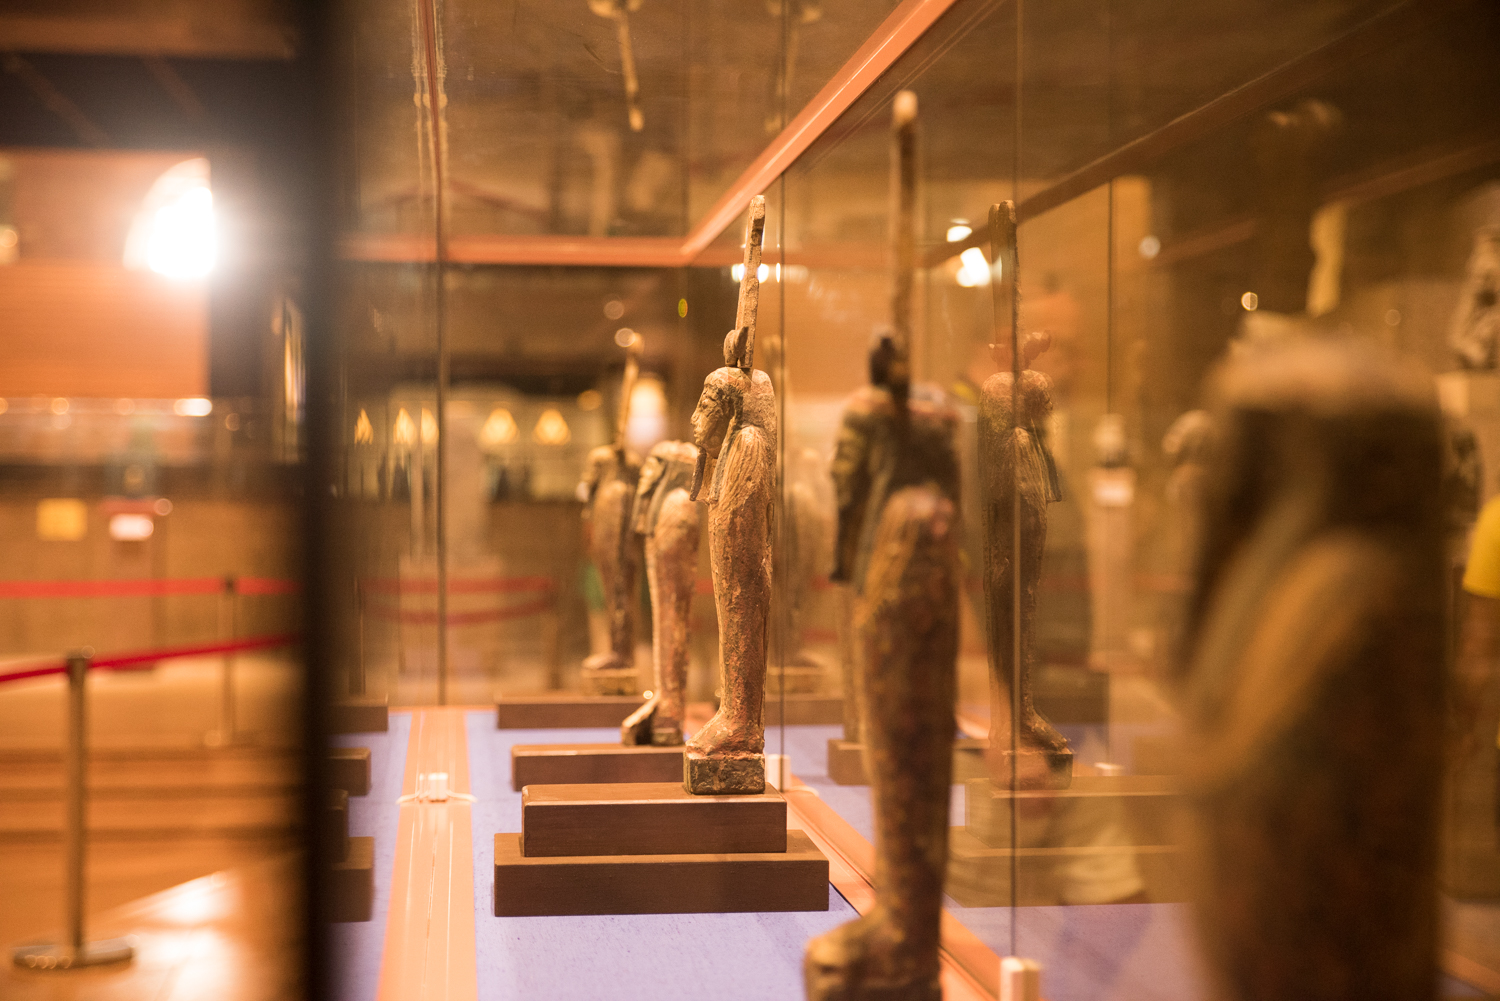
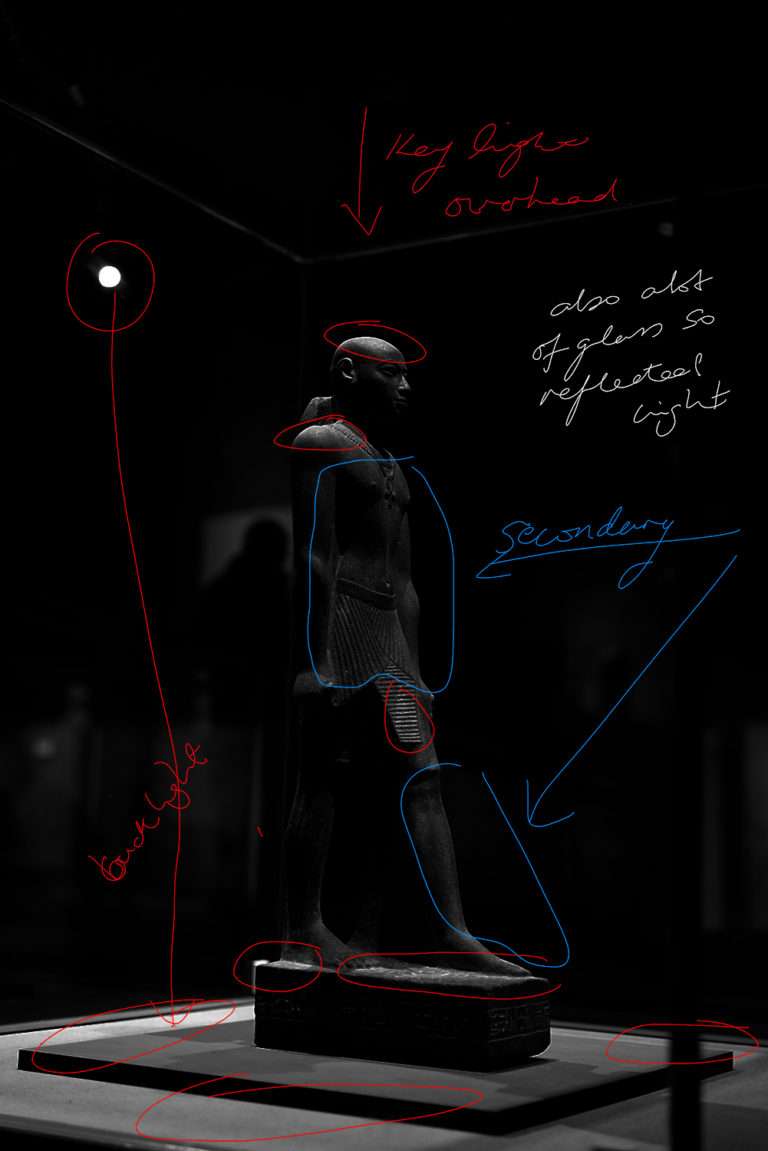
I definitely wanted to emulate the sandy yellows and blues. I used one of the images to look at the lighting:
Once I had the idea in my head, I started thinking about the technical aspects of the image. I knew I wanted to include a hand and initially I wanted this to be my own. However, I also realised that that would make it quite difficult logistically to take the shot and I wanted to do as much as could in camera.
My props list was:
- hand
- stone
- sand
- a container for the sand
- blue paper/cloth for the background
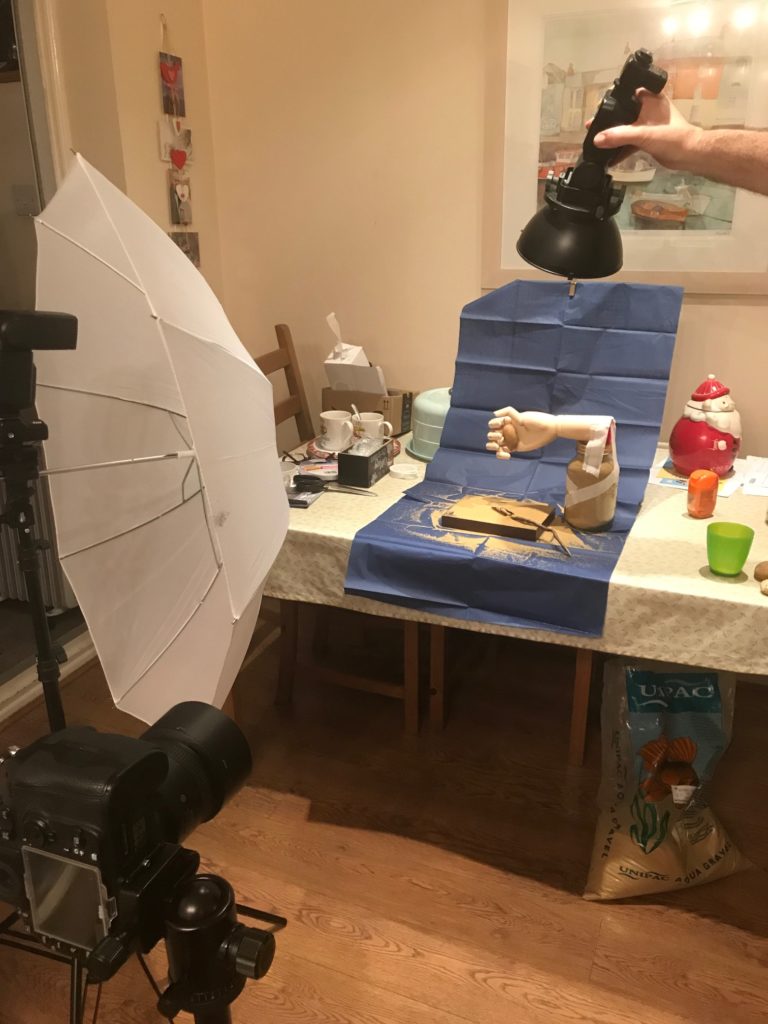
- lighting (two speedlights, umbrella, honeycomb)
I went to the beach and picked a few stones off the beach I settled on one that was oval in shape and fitted nicely within the palm of the hand. It was also a sandstone colour to fit with my Egyptian sand theme. This ended up being a wooden anatomical model that I could make to look like it was holding the stone in a little cage.
We had some sand and found a dark wooden picture frame to be the base for the sand. I had this idea for a kind of zen garden in the sand, so that I could incorporate the grooves, but this element didn’t really work.
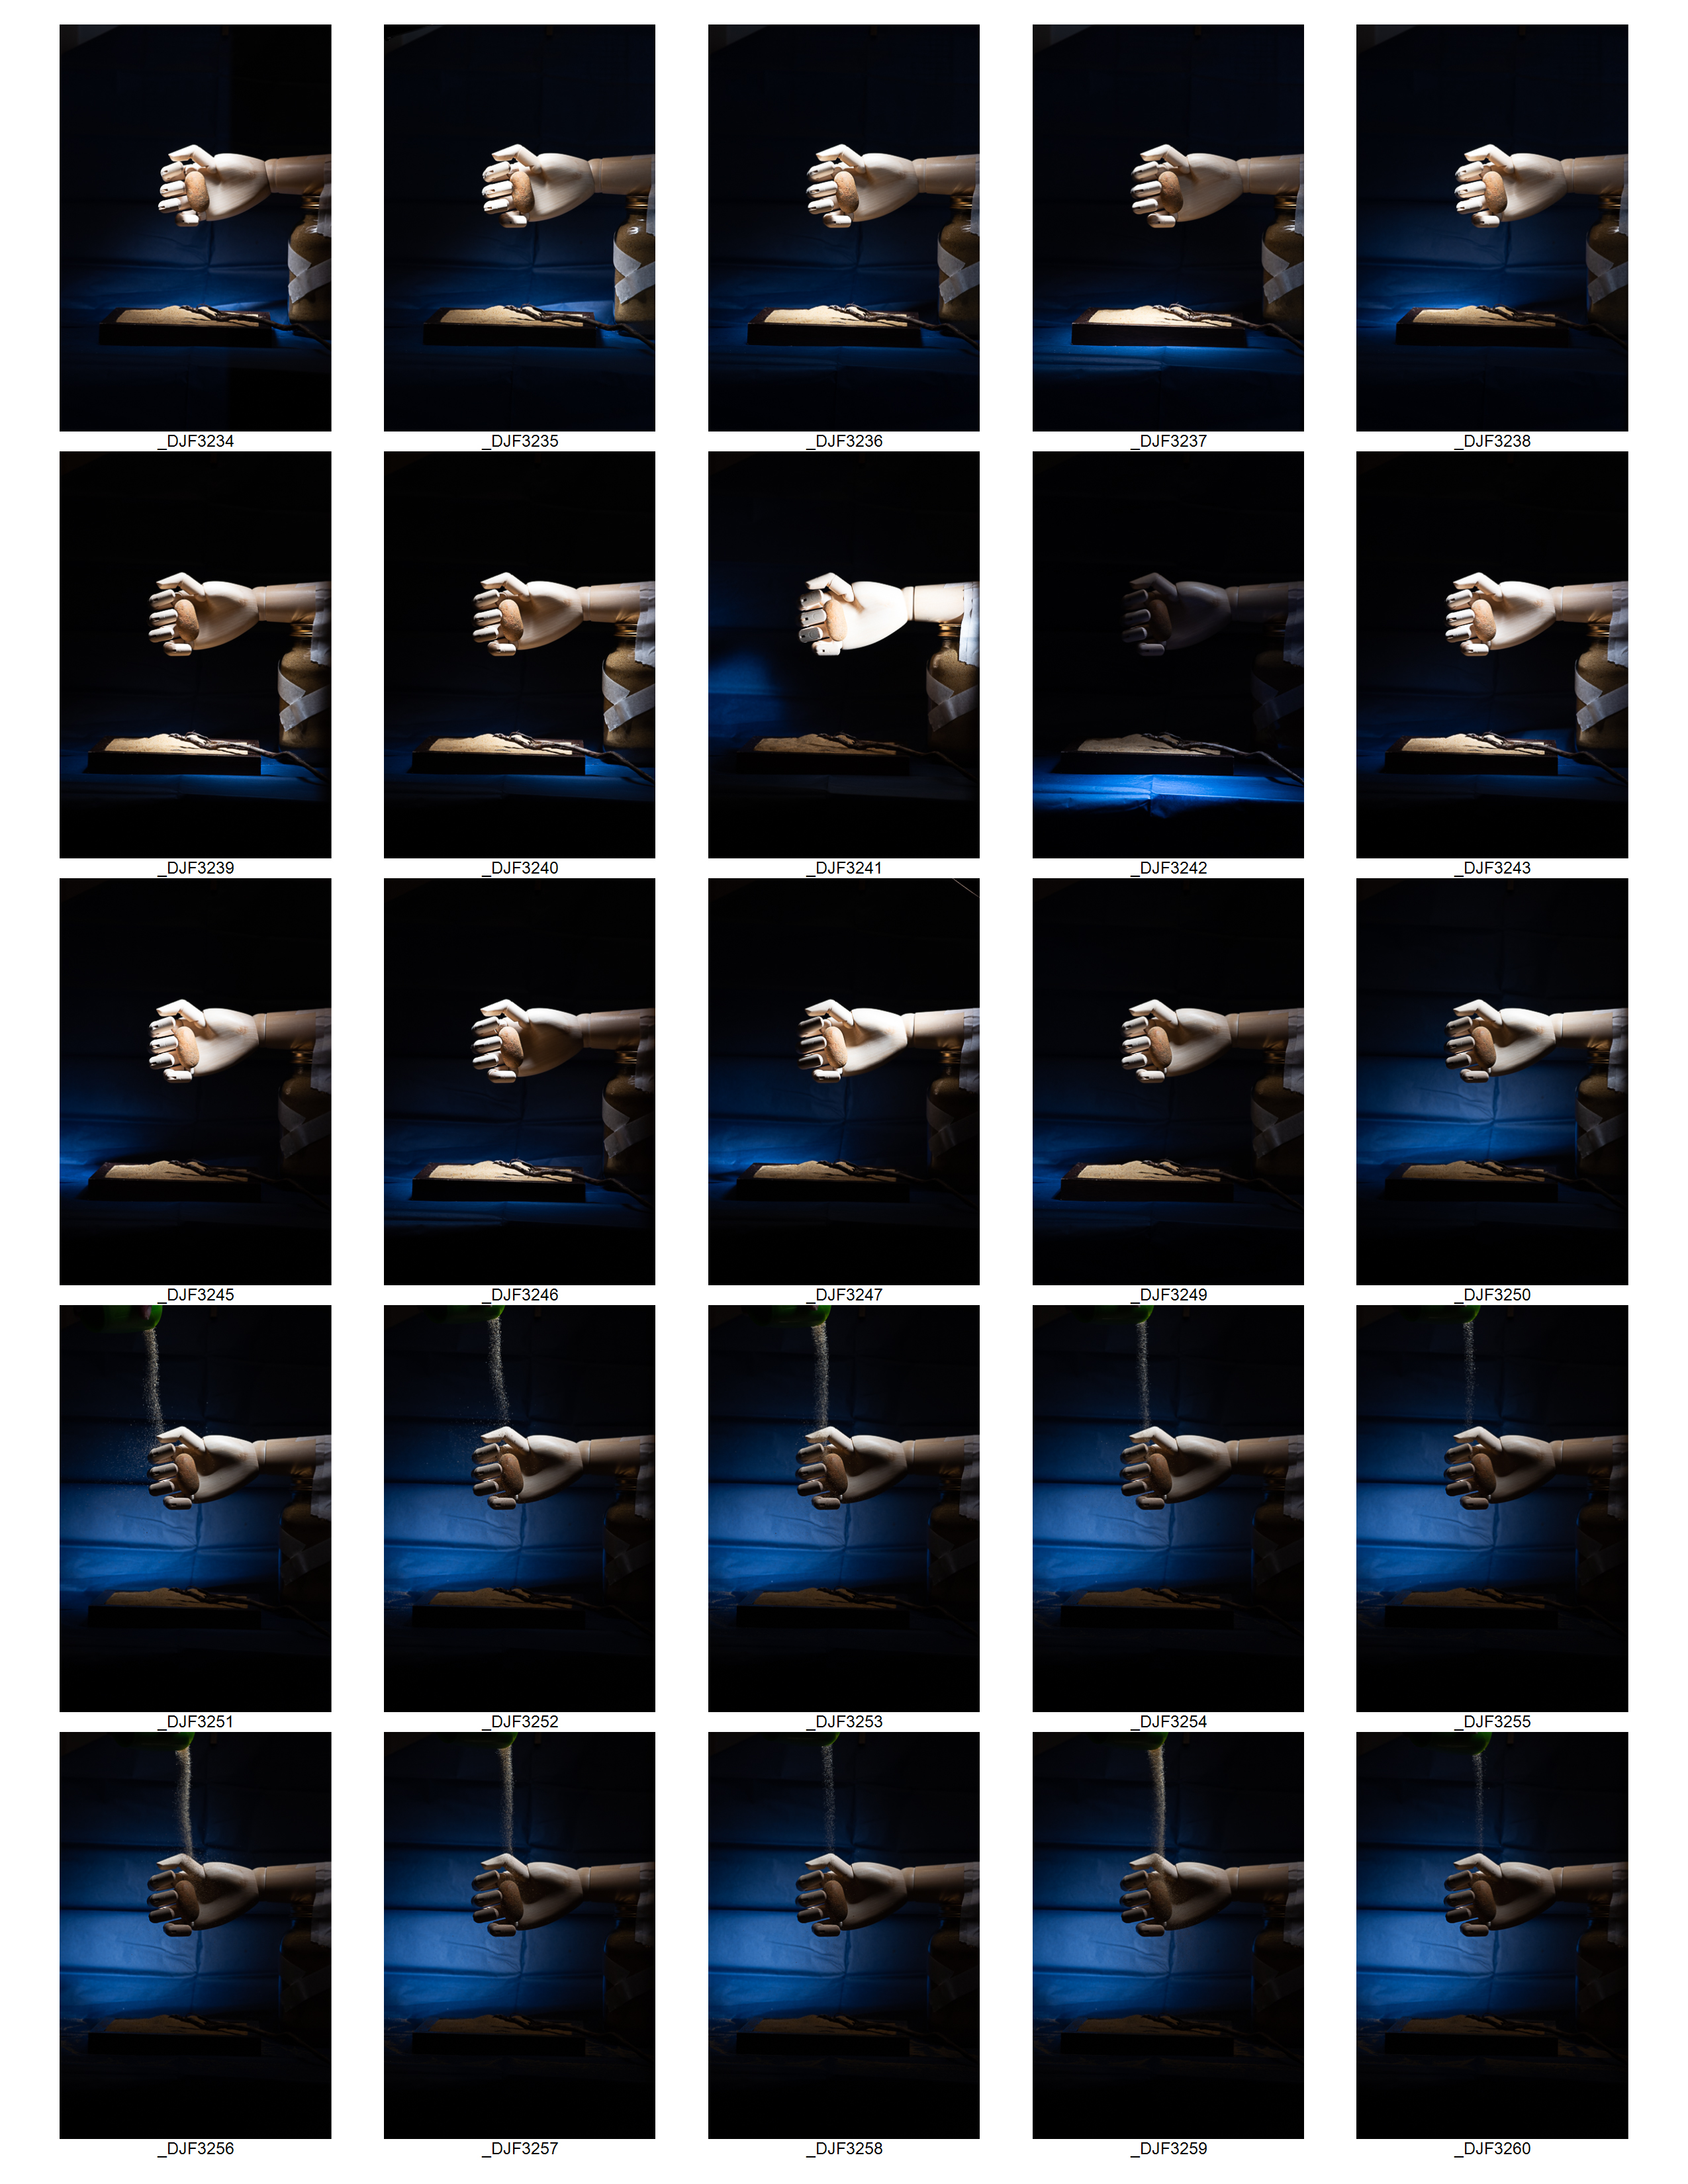
Once all the items were gathered, I set them up on the table in my kitchen with a one shoot through umbrella and a speedlight with a honeycomb dish held directly above this.
Technical Information
The images were taken with a Nikon D810 full frame camera with a 85 mm 1.8 lens. Two speedlights were used to provide a key light above the set up with a dish and honeycomb and a secondary light shot through an umbrella.
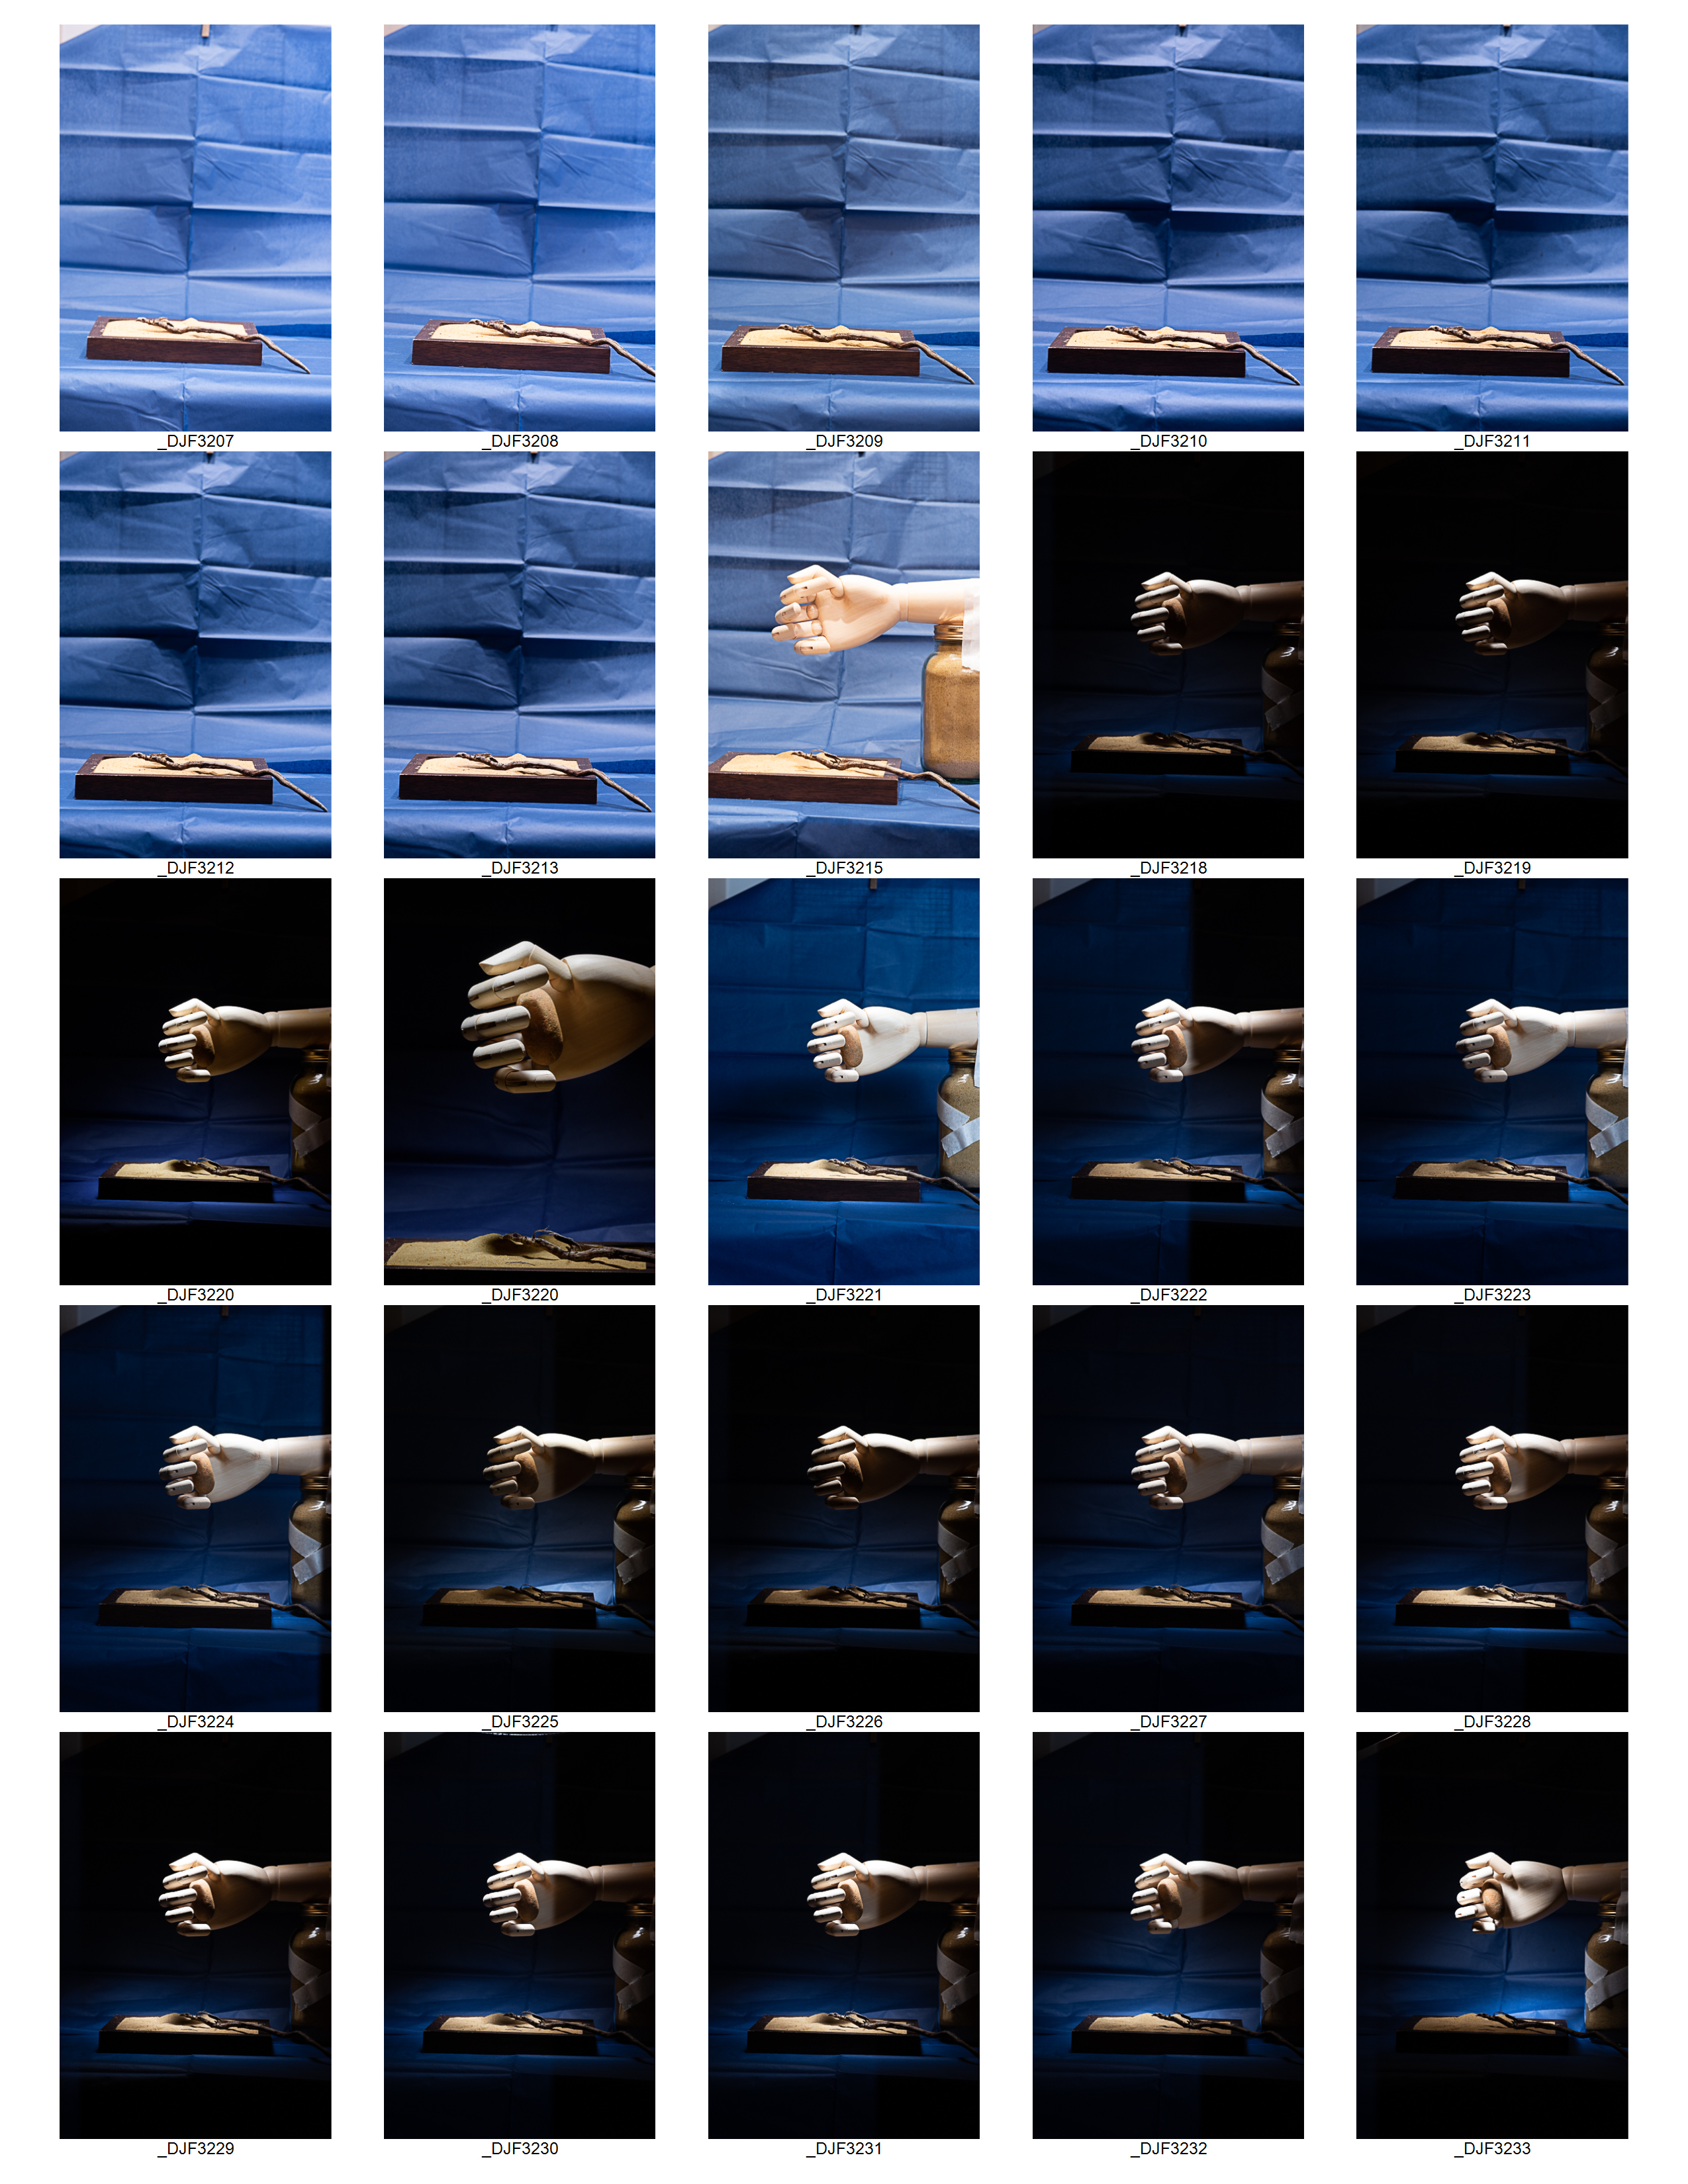
The contact images below demonstrate how the shot was set up and the lighting was adjusted to get the feel desired. It also shows how the set up progressed up until the the sane was poured over the stone.

Editing
The image chosen was one of the last taken. I chose this one because the sand wasn’t too heavy over the stone.
The image was edited using Adobe Lightroom and Photoshop. The sand above the thumb was removed by merging the image with another image where there was no sand.
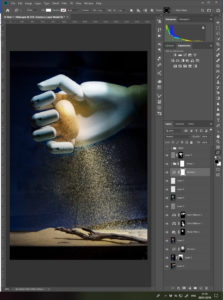
various tools were used including:
- colour balance
- curves
- photofilters
- high pass sharpening
- layers and masks
- displacement maps
- added shapes and blending modes
- overlay
I used a curves layer to make the hand look cooler and stone/sand yellower.
The Final Image
Helen’s Item – Image 1
The item was very small and could be completely enclosed in my hands which are themselves small. The object was smooth to touch and cold at first but warmed up as handled. There were distinct grooves carved around the base and a couple of spikes at the top which felt like cats’ ears.
The item reminded me of an Egyptian idol which led to the idea of the sand and the colours. I have added some ‘secret’ grooves to the stone and I added a metal overlay to the nails to emphasise the cold touch. The fingers represent the cage around the stone.

Reflection
I really enjoyed this and am really looking forward to doing the next item. I have tried to be really strict and finish writing this up before moving on to the next one and I have decided not to view any of the actual items until I have finished them all.
For the next and subsequent items, I will try and make sure that it’s quiet and that I’ve got all of my equipment ready before we start. i.e. get my phone ready to record my comments.
I think I would like all of images to be portrait but of course it may depend on how the next ‘feeling’ session goes and what image I am compelled to make. It will be my aim to print these as A3 paper to be presented alongside images of the items. do I need to make such detailed notes for all of the rest of the images? I will ask my tutor about that.
One Reply to “Assignment 2 – Photographing the Unseen – Item 1”
Comments are closed.